

I love it, however it needed some major updating.. the yarn hair was yucky, it was all marked up, and the little sticker embellishment had to leave! ... :)
I FINALLY have gotten around to re*sanding this baby and re*staining.
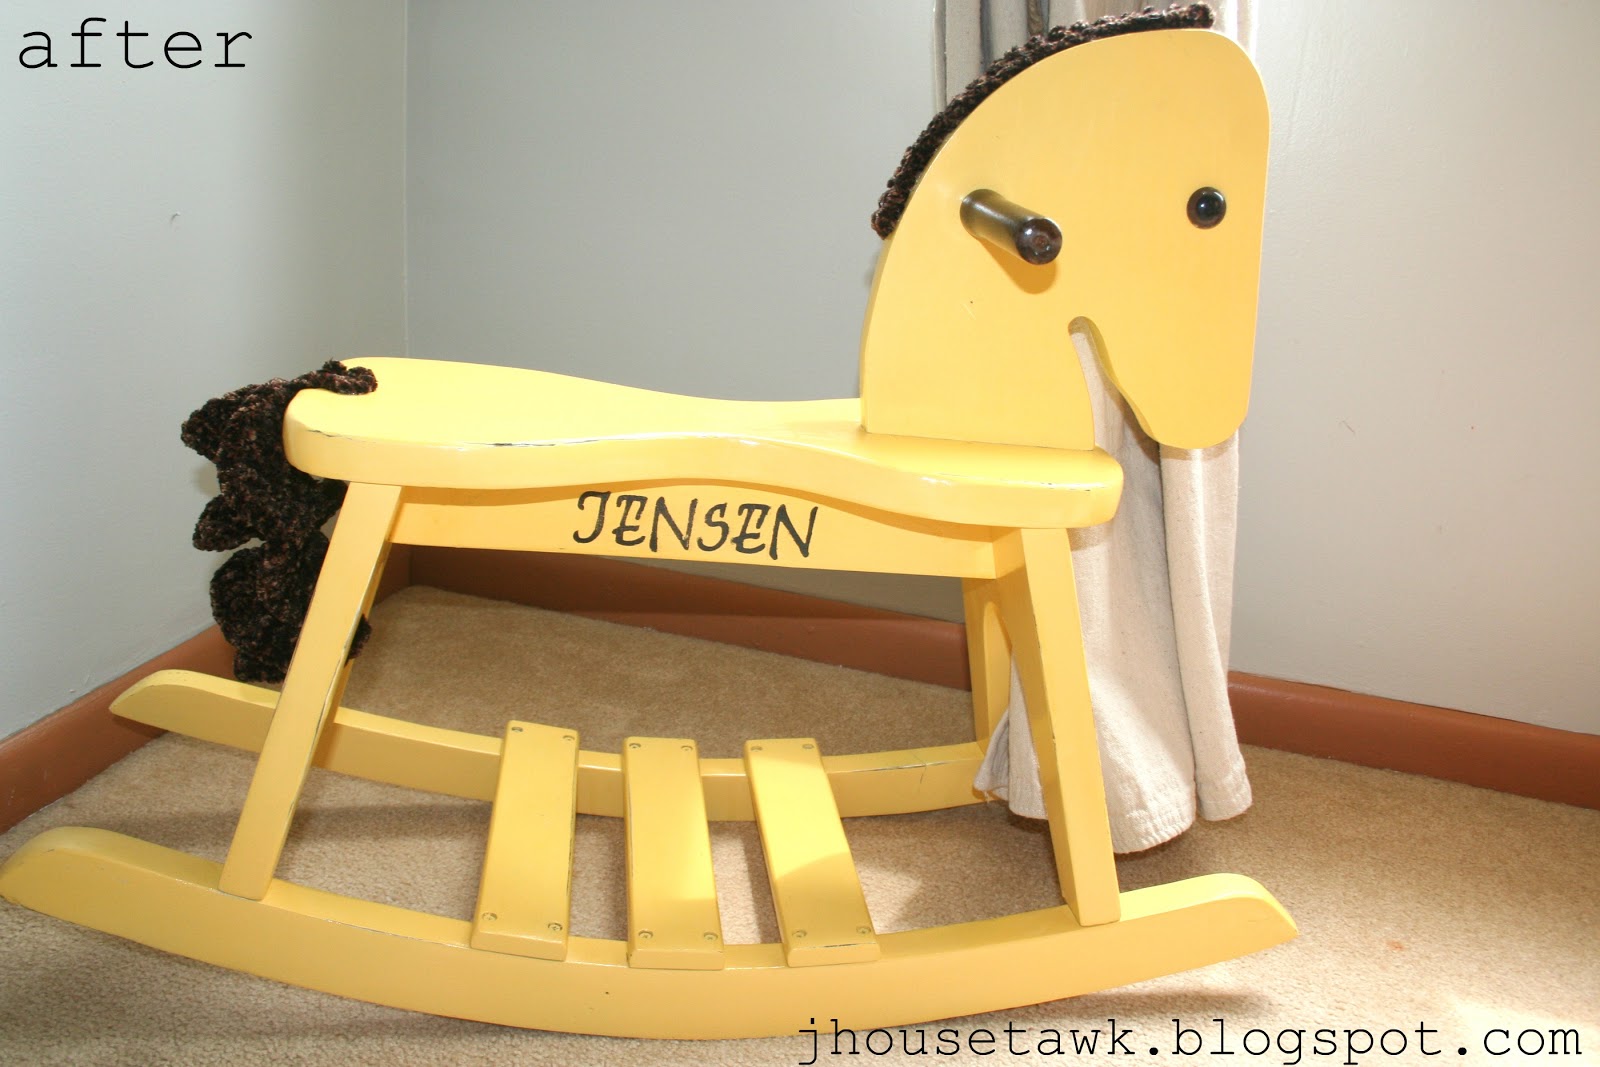
After re-staining it like 5 times, I gave up on the whole wooden look.
The stain was just not cooperating!!.. It was so uneven I was getting so frustrated!
So I took a trip to JoAnn's and bought some primer with a 40% off coupon.
and scored 2 Rustoleum 'Summer Squash' spray cans for (you ready for this?!...) $1.97!!
I was happier than a kid in a candy store.
Afterwards, I applied 2 coats of poly.
Anyways.. Here are some BEFORE PICTURES.. & AFTER PICTURES
:::


HERE ARE THE AFTER PICTURES
::::
I just used all the original hardware.
I also used the same eyeballs and didn't do anything to the handle.
& crochet'd a whole new mane and tail.
I made a loop in the mane so the handle wouldn't be covered with it.
The tail was crochet'd using a curlicue scarf tutorial.
They were then applied with a hot glue gun.
::::
Jayden is the name of my first born so I painted on his name on one side of the horse.
Jensen is going to be the name of this July baby whether it's a boy or a girl so I painted that name on the other side of the horse!


What do you think!?
Love it! It looks so much better! Thank you for linking up with Rustic Restorations Weekend!
ReplyDeleteThankyou, Tammy!! I was so glad when this was finished! .. It took A LOT longer than planned to finish it.
Delete